At George Business, there are three different types of user roles: users, disposers and admins. They each have different permissions and access rights, depending on the tasks they have to handle with George Business.
Last Article Update 19.03.2026
At George Business, there are three different types of user roles: users, disposers and admins. They each have different permissions and access rights, depending on the tasks they have to handle with George Business.
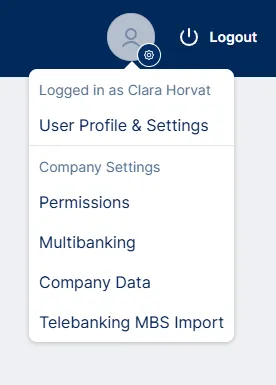
To manage users, please click on your User Profile (next to the logout button) and select "Permissions".
Users have the rights to perform daily business tasks. They can, for example, create and prepare orders or view accounts. This category is well-suited for professions like accountant, who create and view orders but do not need signing rights.
Disposers are mostly people in management who are formally authorised to sign and who are administered by the bank. As authorised signees, they can sign orders but don't need to take on any operational tasks themselves, such as users who initiate the signature process. But George Business is flexible. The admin can therefore combine disposers with the properties of a user. This applies, for example, to authorised signatories who work with George Business and are also authorised to sign.
Product permissions for George Business are determined by the admin(s). Authority to sign, however, is determined by the bank and can't be changed on demand.
Disposers can log in to George Business using the 9-digit disposer number and their approval procedure for signing orders.
Admins manage the rights and permissions of all other users and can make other configurations. The funcionalities of the admin are bound to the role, not the user. There has to be always at least one person on the role of admin. The role cannot be re-named or deleted. The first admin is pre-set during the opening process of the George Business account.
Admins have the following functions:
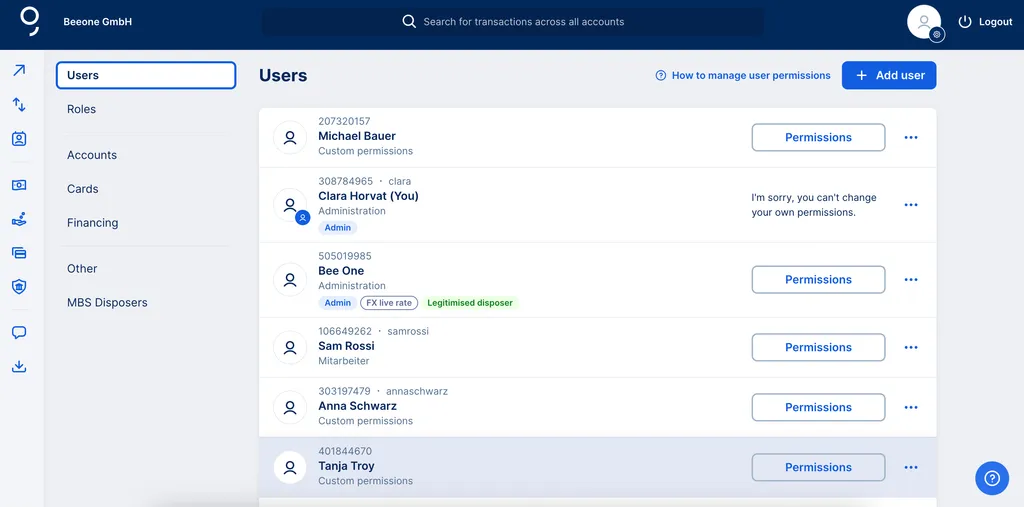
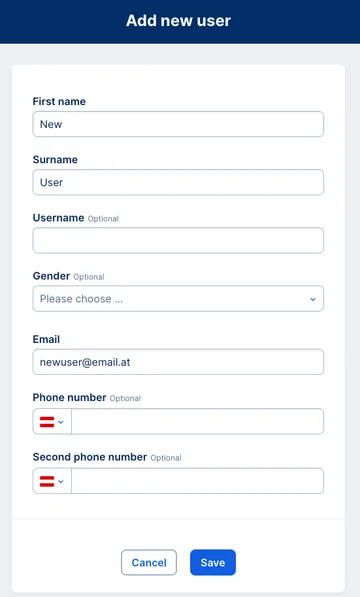
To add a user, go to the admin section. In the overview with the list of all users, you can add a new user by clicking on "Add User". First name, surname and email address are mandatory fields.
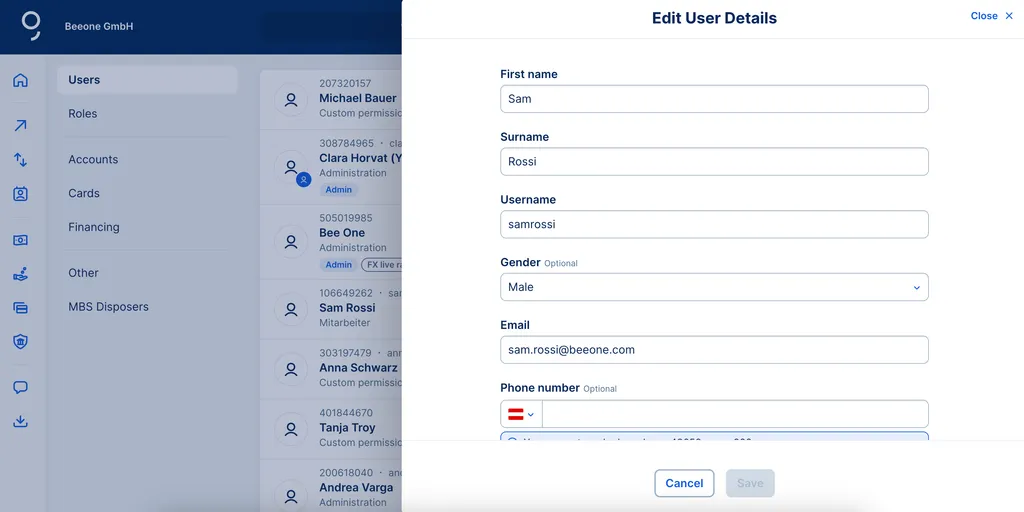
Only the details of regular users can be edited with George Business. Disposer details are managed by the bank.
If you are an admin and want to edit a user, please go to "Users" in your admin section. Click on the user's name to edit the user details. You can add or edit:
Via the menu next to the user's name, you can also do the following:
To manage the user's permissions, just click on "Permissions" next to the user's name. If the user has customised permissions, you can manage them there. If a role is assigned to the user, you can either remove or assign a different role to the user, or manage the permissions of the roles in the section "Roles".
To lock a user, click the three dots (...) next to the user name and select "Lock" in the menu. Once users are locked, they no longer have access to George Business. You can lock a user indefinitely, from a certain date, or for a certain period. To set the dates, enter them in the field or select them via the calendar.
To unlock the user, click on "Unlock" next to the user's name. Confirm your action. The user then immediately has access to George Business again.
To delete a user, click the three dots (...) next to the user name and select "Delete" in the menu. Confirm your action. Once users are deleted, they cannot be restored.
Once you are in your users overview, you can edit permissions. There are three ways to do this:
You can also manage authorisations per product instead of per user/group. You can find out more about this in the article on managing products.
You can transfer (copy) the permissions of an already created user to a new user. In the list of users, select the user who should receive the new permissions, then click on the three dots on the right and choose "Copy permissions". Next, select the user whose permissions you want to copy. You will then see a preview of these permissions. In the final step, confirm the transfer of the permissions. Please note that only individual permissions can be copied and assigned this way.
For transfers in foreign currencies, different exchange rate settings ("First Group Fixings" or "Live") can be applied, which can be preset. However, this only affects disposers and admins who are permitted to carry out foreign currency transactions.
To do so, go to the action menu next to the disposer's or admin's name. Click on "Manage FX rate". Then you can select the desired exchange rate type by switching the respective toggle button on or off. The change is effective immediately.
Authors: Stephanie Schüller